Support our educational content for free when you purchase through links on our site. Learn more
How to Create a Virtual Tour in 12 Easy Steps [2024] 🌍
Have you ever wanted to create a virtual tour that captivates your audience and showcases your space in a unique and immersive way? Look no further! In this comprehensive guide, we will walk you through the process of creating a virtual tour step by step. Whether you’re a real estate agent, a business owner, or simply someone who wants to share their space with others, this article is for you. So let’s dive in and learn how to create a virtual tour that will leave your audience in awe!
Table of Contents
- Quick Answer
- Quick Tips and Facts
- Background: The Power of Virtual Tours
- Step 1: Determine the Best Type of Virtual Tour to Offer
- Step 2: Choose the Right Equipment
- Step 3: Select Virtual Tour Software
- Step 4: Plan the Shots for Your Virtual Tour
- Step 5: Clean & Stage Each Room
- Step 6: Level the Tripod
- Step 7: Take Test Shots
- Step 8: Take All Photos on Your Image Shot List
- Step 9: Compose Your Virtual Tour
- Step 10: Share Your Virtual Tour
- Step 11: Statistics & Benefits of Creating a Virtual Tour
- Step 12: Bottom Line
- FAQ
- Conclusion
- Recommended Links
- Reference Links
Quick Answer
Creating a virtual tour involves several steps, from determining the best type of virtual tour to offer to sharing your final product. Here’s a quick overview of the process:
- Determine the best type of virtual tour to offer.
- Choose the right equipment.
- Select virtual tour software.
- Plan the shots for your virtual tour.
- Clean and stage each room.
- Level the tripod.
- Take test shots.
- Take all photos on your image shot list.
- Compose your virtual tour.
- Share your virtual tour.
Now, let’s dive into each step in more detail!
Quick Tips and Facts
Before we get started, here are some quick tips and facts to keep in mind:
- Virtual tours are a powerful tool for showcasing spaces and attracting potential buyers or visitors.
- Different types of virtual tours include walk-through tours, 3D virtual tours, and interactive 360-degree tours.
- The right equipment, such as a DSLR camera, fisheye lens, and tripod, is essential for capturing high-quality images.
- Virtual tour software, like Asteroom, Matterport, and iStaging, can help you create interactive and engaging tours.
- Cleaning and staging each room before capturing photos will ensure your virtual tour looks its best.
- Leveling the tripod and taking test shots are crucial for achieving professional-looking results.
- Composing your virtual tour involves arranging the photos in a logical and visually appealing sequence.
- Sharing your virtual tour on your website, social media platforms, and other relevant channels will help you reach a wider audience.
Now that you have a general idea of what to expect, let’s dive into the details!
Background: The Power of Virtual Tours

Virtual tours have revolutionized the way we experience spaces. Whether you’re a real estate agent looking to showcase a property, a business owner wanting to give customers a virtual tour of your establishment, or an individual who wants to share their space with others, virtual tours offer a unique and immersive experience.
According to a study by Redfin, homes with virtual tours receive 87% more views than those without. This statistic alone highlights the power of virtual tours in attracting potential buyers or visitors. By providing an interactive and realistic experience, virtual tours allow people to explore a space from the comfort of their own homes.
But virtual tours aren’t just for real estate. They can be used in various industries, including hospitality, education, and tourism. Imagine taking a virtual tour of a hotel before booking a room, exploring a university campus before applying, or visiting famous landmarks around the world without leaving your living room. The possibilities are endless!
Now that you understand the impact of virtual tours, let’s move on to the practical steps of creating one.
Step 1: Determine the Best Type of Virtual Tour to Offer
When it comes to virtual tours, there are several types to choose from. Each type offers a unique experience and serves different purposes. Here are the most common types of virtual tours:
-
Walk-through Tour: This type of tour involves recording a video as you walk through the space. It provides a realistic and immersive experience, allowing viewers to feel like they’re physically present.
-
3D Virtual Tour: A 3D virtual tour offers an interactive experience where viewers can click through 3D images of the space. It allows for a more detailed exploration, giving viewers control over what they want to see.
-
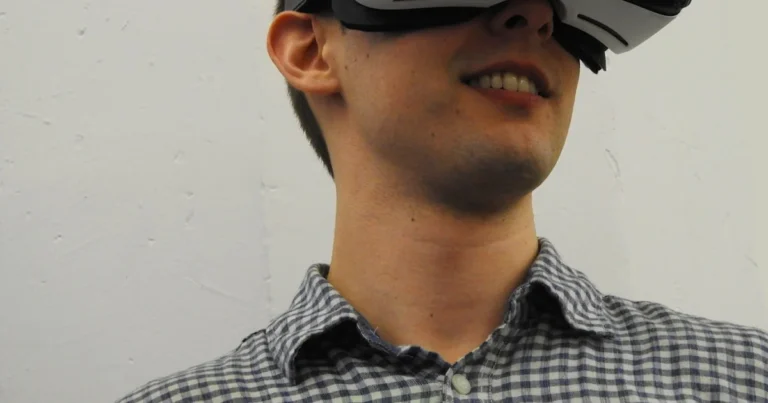
Interactive 360-degree Virtual Tour: This type of tour offers a fully immersive experience of walking through a space. Viewers can navigate the tour by clicking and dragging their mouse or using their fingers on a touchscreen device.
When determining the best type of virtual tour to offer, consider your goals, target audience, and the nature of the space you want to showcase. Each type has its advantages and can be tailored to suit your specific needs.
Step 2: Choose the Right Equipment
To capture high-quality images for your virtual tour, you’ll need the right equipment. Here are some essential items to consider:
-
DSLR Camera: A digital single-lens reflex (DSLR) camera will give you the flexibility and control needed to capture professional-looking photos.
-
Fisheye Lens: A fisheye lens offers a wide-angle view, allowing you to capture more of the space in a single shot. It creates a unique perspective that adds depth to your virtual tour.
-
Tripod: A sturdy tripod is essential for keeping your camera steady and ensuring sharp images. Look for a tripod with adjustable legs and a leveler to ensure your shots are straight.
-
Panoramic Tripod Head: If you’re planning to create 360-degree virtual tours, a panoramic tripod head will allow you to capture seamless panoramic images.
-
Carry Case: Investing in a quality carry case will protect your equipment and make it easier to transport from one location to another.
While these are the basic essentials, there are other accessories you may find useful, such as extra batteries, memory cards, and a remote shutter release. Choose equipment that suits your budget and needs, and don’t forget to do your research to find the best options available.
Step 3: Select Virtual Tour Software
Once you have captured all the necessary photos, you’ll need virtual tour software to bring them to life. Here are some popular virtual tour software options:
-
Asteroom: Asteroom offers affordable and easy-to-use virtual tour software. It allows you to create high-resolution virtual tours from your smartphone.
-
Matterport: Matterport is a leading virtual tour software that offers advanced features like 3D floor plans and interactive 3D tours. It provides a comprehensive solution for creating immersive virtual experiences.
-
iStaging: iStaging is another popular virtual tour software that offers a range of features, including virtual staging, 360-degree tours, and augmented reality (AR) integration.
-
EyeSpy360: EyeSpy360 is known for its user-friendly interface and interactive virtual tour creation. It offers features like floor plans, hotspot navigation, and lead generation tools.
When selecting virtual tour software, consider factors such as ease of use, features, pricing, and compatibility with your captured images. Take advantage of free trials or demos to test out different software options before making a final decision.
Step 4: Plan the Shots for Your Virtual Tour
Before you start capturing photos, it’s essential to plan the shots for your virtual tour. This will ensure that you capture all the necessary angles and highlight the best features of the space. Here are some tips for planning your shots:
-
Create a shot list: Make a list of all the shots you want to capture, including different angles, rooms, and key features. This will serve as your guide during the photoshoot.
-
Consider the flow: Think about how you want viewers to navigate through the virtual tour. Plan your shots in a way that creates a logical and visually appealing sequence.
-
Highlight key features: Identify the unique selling points of the space and make sure to capture them in your shots. This could be architectural details, stunning views, or special amenities.
By planning your shots in advance, you’ll save time during the photoshoot and ensure that you capture all the essential elements of the space.
Step 5: Clean & Stage Each Room
To make your virtual tour look its best, it’s important to clean and stage each room before capturing photos. Here are some tips for preparing the space:
-
Declutter: Remove any unnecessary items from the room to create a clean and spacious look. This includes personal belongings, excessive furniture, and cluttered surfaces.
-
Clean thoroughly: Dust, vacuum, and clean all surfaces to ensure a polished and presentable appearance. Pay attention to details like windows, mirrors, and floors.
-
Stage strategically: Arrange furniture and decor in a way that highlights the best features of the room. Use props like fresh flowers or decorative pillows to add a touch of warmth and personality.
Remember, the goal is to create a space that is visually appealing and allows viewers to imagine themselves in the room. Take the time to stage each room properly, and the results will be worth it!
Step 6: Level the Tripod
Before you start capturing photos, it’s crucial to level your tripod. This will ensure that your shots are straight and aligned properly. Here’s how to level your tripod:
-
Extend the tripod legs to your desired height and lock them in place.
-
Place a bubble level on top of your camera or tripod head.
-
Adjust the tripod legs until the bubble is centered in the level.
-
Double-check the levelness by looking through the viewfinder or using the camera’s built-in level.
Taking the time to level your tripod will result in professional-looking photos that are visually pleasing to the viewer.
Step 7: Take Test Shots
Before you start capturing all the photos for your virtual tour, it’s a good idea to take some test shots. This will allow you to make any necessary adjustments and ensure that your camera settings are correct. Here’s how to take test shots:
-
Set up your camera on the tripod and frame your shot.
-
Adjust the camera settings, such as aperture, shutter speed, and ISO, to achieve the desired exposure.
-
Take a test shot and review the image on your camera’s LCD screen.
-
Check for proper exposure, sharpness, and composition.
-
Make any necessary adjustments to the camera settings or composition.
By taking test shots, you can fine-tune your camera settings and ensure that your final photos are of the highest quality.
Step 8: Take All Photos on Your Image Shot List
Now that you’ve planned your shots, prepared the space, and taken test shots, it’s time to capture all the photos on your shot list. Follow your shot list and take your time to ensure that each shot is properly framed and exposed. Here are some tips for capturing great photos:
-
Use natural light whenever possible: Open curtains or blinds to let in natural light. Avoid using flash, as it can create harsh shadows and unnatural lighting.
-
Bracket your shots: Take multiple shots at different exposures to capture a wider dynamic range. This will give you more flexibility during the editing process.
-
Experiment with angles: Try shooting from different angles to add variety to your virtual tour. Capture both wide shots and close-ups to showcase different aspects of the space.
-
Focus on details: Don’t forget to capture the small details that make the space unique. This could be architectural features, textures, or decorative elements.
Remember, the quality of your photos will greatly impact the overall look and feel of your virtual tour. Take your time and ensure that each shot is well-composed and visually appealing.
Step 9: Compose Your Virtual Tour
Once you have captured all the necessary photos, it’s time to compose your virtual tour. This involves arranging the photos in a logical and visually appealing sequence. Here are some tips for composing your virtual tour:
-
Start with an engaging shot: Choose a captivating photo to serve as the first impression of your virtual tour. This could be a stunning exterior shot or a beautifully staged room.
-
Create a flow: Arrange the photos in a way that guides the viewer through the space. Consider the natural flow of the space and create a virtual walkthrough experience.
-
Use transitions: Add transitions between photos to create a seamless and immersive experience. This could be a fade, dissolve, or swipe effect.
-
Include captions or descriptions: Provide context for each photo by adding captions or descriptions. This will help viewers understand the purpose and features of each room.
By carefully composing your virtual tour, you’ll create a cohesive and engaging experience for your audience.
Step 10: Share Your Virtual Tour
Now that your virtual tour is complete, it’s time to share it with the world! Here are some ways to share your virtual tour:
-
Embed it on your website: Add the virtual tour to your website to showcase your space to potential visitors or buyers.
-
Share on social media: Post your virtual tour on social media platforms like Facebook, Instagram, and YouTube to reach a wider audience.
-
Email marketing: Include a link to your virtual tour in your email marketing campaigns to engage your audience and generate leads.
-
Virtual tour platforms: Upload your virtual tour to platforms like Asteroom, Matterport, or iStaging to reach a larger audience and gain exposure.
Remember to promote your virtual tour actively and encourage viewers to share it with their networks. The more people who see your virtual tour, the greater the impact it will have!
Step 11: Statistics & Benefits of Creating a Virtual Tour
Creating a virtual tour offers numerous benefits and can have a significant impact on your business or personal goals. Here are some statistics and benefits to consider:
-
According to a study by Redfin, homes with virtual tours receive 87% more views than those without. Virtual tours can attract more potential buyers or visitors to your space.
-
Virtual tours can reduce wasted viewings by about 40%. By allowing viewers to explore the space remotely, you can pre-qualify potential buyers or visitors and save time.
-
Virtual tours give your listings a competitive edge. In a digital world where attention spans are short, virtual tours provide a unique and engaging experience that sets you apart from the competition.
-
Virtual tours appeal to a wider audience. Whether your target audience is local or global, virtual tours allow people from anywhere in the world to explore your space.
-
Virtual tours generate more leads. By capturing the attention of potential buyers or visitors, virtual tours can increase inquiries and ultimately lead to more conversions.
By creating a virtual tour, you’re harnessing the power of technology to showcase your space in a way that is engaging, immersive, and memorable.
Step 12: Bottom Line
Creating a virtual tour may seem like a daunting task, but with the right equipment, software, and planning, it can be a rewarding and impactful experience. By following the steps outlined in this guide, you’ll be well on your way to creating a virtual tour that captivates your audience and showcases your space in the best possible light.
Remember, virtual tours have the power to attract more potential buyers or visitors, reduce wasted viewings, and give your listings a competitive edge. So why wait? Start creating your virtual tour today and unlock the full potential of your space!
FAQ

Can I create a virtual tour for free?
Yes, there are free virtual tour software options available, such as Asteroom’s free plan. However, keep in mind that free plans may have limitations in terms of features and customization options. If you’re looking for more advanced features, you may need to invest in paid virtual tour software.
How do I set up a virtual tour?
To set up a virtual tour, you’ll need to follow the steps outlined in this guide, including determining the best type of virtual tour to offer, choosing the right equipment, selecting virtual tour software, planning the shots, cleaning and staging each room, leveling the tripod, taking test shots, capturing all the photos on your shot list, composing the virtual tour, and sharing it with your audience.
Read more about “Types of Virtual Tourism … 🌍”
Is Google tour creator free?
Google Tour Creator was a free tool that allowed users to create virtual tours using 360-degree images. However, as of September 2021, Google has discontinued Tour Creator. There are still other virtual tour software options available, such as Asteroom, Matterport, and iStaging.
How do I create a virtual tour on my iPhone?
To create a virtual tour on your iPhone, you’ll need a compatible virtual tour app, such as Asteroom or Matterport. These apps allow you to capture 360-degree photos using your iPhone’s camera and create virtual tours directly from your device. Simply follow the app’s instructions to capture the photos, compose the virtual tour, and share it with your audience.
If you have any other questions about creating a virtual tour, feel free to reach out to us. We’re here to help!
Conclusion

Creating a virtual tour is an exciting and rewarding process that allows you to showcase your space in a unique and immersive way. By following the steps outlined in this guide, you’ll be well-equipped to create a virtual tour that captivates your audience and leaves a lasting impression.
Remember to determine the best type of virtual tour to offer, choose the right equipment, select virtual tour software, plan your shots, clean and stage each room, level your tripod, take test shots, capture all the necessary photos, compose your virtual tour, and share it with your audience. By taking the time to plan, prepare, and execute each step, you’ll create a virtual tour that stands out from the crowd.
So what are you waiting for? Start creating your virtual tour today and unlock the full potential of your space!
Recommended Links
- Technology for Walkathons
- Fundraising Ideas
- Event Promotion
- Global Walkathon Events
- Equipment Reviews
- Types of Virtual Tourism 2024
Reference Links